Tuesday, September 4, 2012

Lynn's 15-Minute Cake Batter Cookies

This is such a smart concept, and one that I wouldn't have learned about if not for my co-worker Lynn's southern hospitality when she brought a batch of cake-batter cookies into work one day. Now, I love cookies as much as the next person, but I typically stop at one. I ate four with no remorse. These things are delicious! Cake-batter cookies are fast, easy, and strike just the right chord between the tastiness of cake and the portability of cookies.

Ingredients

  • 1 box of cake mix (any kind; I recommend Pillsbury Funfetti mix to start with)
  • 1/2 cup oil
  • 2 eggs
Directions

1. Preheat the oven to 350 degrees.
2. Stir together cake mix, oil, and eggs thoroughly.
3. Take spoonful-sized lumps of your newly-made dough and place on a cookie sheet.
4. Bake for 8-9 minutes. Unlike cookie dough, cake-batter cookies will not become golden on the top when they are ready, so use a toothpick through the center of a cookie to test if it is baked thoroughly. Bakes 18-20 cookies.

These cookies will be softer then an average cookie when they come out of the oven, so be sure to give them plenty of cooling time! Then enjoy. 

 
Lynn also suggests the following variations: yellow cake mix with chocolate chips and pecans; devil's food cake mix with white chocolate chips; and red velvet cake mix with cream cheese frosting.

Be well!
Laura

Wednesday, August 29, 2012

Favorite Things

Apparently we took a little summer break from posting! So I'm putting up some map stuff because it's cool and I need to get in the habit of posting again. 


xoxo

Saturday, June 2, 2012

Camping Mess Kits

Inspired by a little craft from my years in the Girl Scouts, and the desire to have a few ready-to-go camping items available to pack up for spur of the moment trips, I made these netted mess kits. It was super fast and easy with just a few items. It makes it easy to pack dishes and after washing it is a place to hang them for fast drying out in the woods! 


Materials:
-White mesh fabric (At least 1/2 yard to work with)
-Cording or thick yarn (about a yard)
-Thread 
-Sewing machine 
-Camping dishes


Step One: Sew the right side
The bottom of the bag will be the fold already in the fabric, so we need to sew the sides and the edge that the cording will go into. I sewed the right side together first, then placed the dishes onto the fabric to cut it to size. 


Where the scissors are is the top of the bag, and if you look closely you can see the right side is already sewn. But do not sew the left side up yet, because you need to sew the top edge into a loop where the cording will go first.


Step Two: Sew the top loop
In the picture above I trimmed a couple inches off the top of the bag. Now you will fold down the top edge about an inch and sew it down, making sure all the raw seems are inside the bag. The yarn in the picture below is to show where the cording will go. 


Step Three: Sew up the left side
With the bag inside out, you will sew up the left side to complete the bag, but stop a half inch from the top, so you don't sew up the loop's opening where you will feed the cording through. Make sure you reinforce the area you are sewing near the loop openings, so it won't tear open. Now turn the bag right side out and you are ready to feed the cord through the top loop.


Step Four: I used thick tape and Gorilla Glue to secure the two ends of the cording, but you could use almost anything. Add dishes and hit the road! 


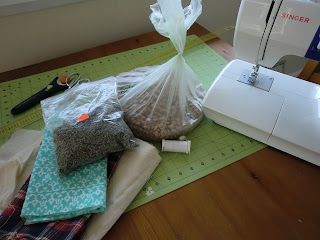
What every good crafter needs in her supplies: 


xoxo


Tuesday, May 29, 2012

Black Bean and Corn Salsa-Guac.

Soooo it's obviously been a while since my last post, so I figure this time I should post something worthwhile. In this case, it was a creation I came up with last week. This stuff is delicious on pretty much anything, but I really like it on the new Mission Multigrain chips that just hit shelves this season.

In any case, you'll be making double batches in no time.

Ingredients:
1 ear of corn, boiled (or canned niblets if you're in a bind)
1 can black beans
1/2 sweet white onion
1 avocado
1 can fire-roasted tomatoes
1/4 cup white rice vinegar
fresh cilantro
chili powder
black ground pepper

It's pretty basic: cut the corn off the cob (or if using niblets, pan fry with pepper), strain the beans and the fire roasted tomatoes, and chop up the avocado, onion, and cilantro. Then put it in a bowl with the vinegar and chili powder, stir it all up, and-- ta da-- yummy salsa-guac.


Then dig in! That's the best part.

Happy summer days to you all!
Laura

Monday, April 9, 2012

DIY Bleached Tees

Warm air means that it's time for outdoor projects... finally!

I originally found this idea on A Beautiful Mess and thought to give it a try; now I'm hooked and have more projects planned with bleach painting. This is an easy one that requires not much more than you'd probably find at home, or would spend $10 on at the store.

Bleached Tees 


Materials:
  • t-shirt(s)
  • bleach
  • paint brush
  • cardboard 


*Note: This project is obviously best for the outdoors because of the use of concentrated bleach. However, if you're stuck with a rainy day, just make sure you have plenty of windows open!

1. Take your tee and place a layer of cardboard inside so the bleach doesn't bleed through to the back.

 
2. Use a small paintbrush to make very light strokes-- too heavy with the bleach and it'll run and look bloppy. You'll be able to see results almost instantly!


3. Once your design looks how you like, just let it sit outside to dry for a bit. Then, wash and wear!


Enjoy the sunshine! Cheers!

Monday, March 26, 2012

Relaxing Lavender Heat Pads


Materials:

-1/4 yard of flannel or cotton for outer case (I like cozy flannel prints!)
-At least 7 inches in width of thin cotton like muslin for inner heat pad


-Thread
-Sewing machine or hand sewing abilities
-Cutting tools
-Pinto beans
-Bulk lavender


Step One: Mix beans and lavender

-I mix about one cup beans and one tablespoon of lavender per "pouch."

-I sew about four pouches for each heating pad.


Step Two: Inner heating pad

-Sew muslin together to make a tube, keeping
one end open to fill with beans.

-After edges are sewn together, turn inside out
so seams are on the inside. After sewing, mine
was about 5" x 17" and one 5" end was left open.


-Pour one cup of bean/lavender mixture
into muslin tube, so it collects at the bottom.


-Now you're going to sew these beans in,
making a pouch about 5" in length.
The hardest part is keeping the beans
from wandering into your seam line (see pic).


-Continue with this pattern, pouring in beans and sewing up until you have four pouches.
-To sew up the end, fold in the raw edges and sew it closed.
-That is your inner heating pouch!


Step Three: Outer casing

-Take your 1/4 yard of outer material, hopefully the length will be similar to the muslin if you
buy it by the yard. It should be a couple inches longer since the muslin has been sewed up.


-First you want to sew the upper edges of the side that will remain open, so the inner pouch can slide in and out (just like a pillow case!).

-Make sure you sew up these edges first. I just roll the edge over a couple times, so no raw is showing. Ironing it flat makes sewing easier if you choose.


-Next sew your pieces together, wrong side out, leaving the top edge open.


Once edges are sew together, turn right side out and insert inner pouch. Your heating pad is completed!


Mmmm toasty


Cozy plaid!


Depending on microwave strength, I put it in for about 45 - 60 seconds. It stirs up the lavender smell and is wonderfully comfortable on a cold night or getting over a headache.

Or try freezing it on a hot day!

xox


Saturday, March 10, 2012

Green Juice


A recipe for all the juicers out there:


One cucumber
+
Two green apples
+
Two kiwis
=


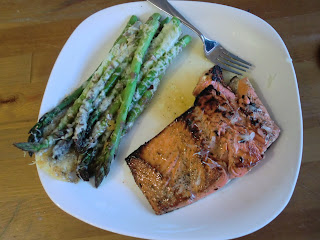
It paired very nicely with my first attempt at salmon!